AJA Configuration
Last updated
Last updated
Before you begin to install and configure AJA drivers and firmware, make sure that you uninstalled all AJA related entities because this process requires clean installation.
Supported Driver Version: 16.2.4.6
Firmware Date: 2021/09/16 14:33:45
Corvid44 12G BNC
c44_12g_8k_tprom_2021-12-19.bit
Corvid 44 BNC
corvid_44_2021-09-16.bit
Corvid88
corvid_88_2021-11-30.bit
The following guide will utilize a configuration method for AJA Corvid 44 BNC card, but it is also applicable to other certified AJA drivers.
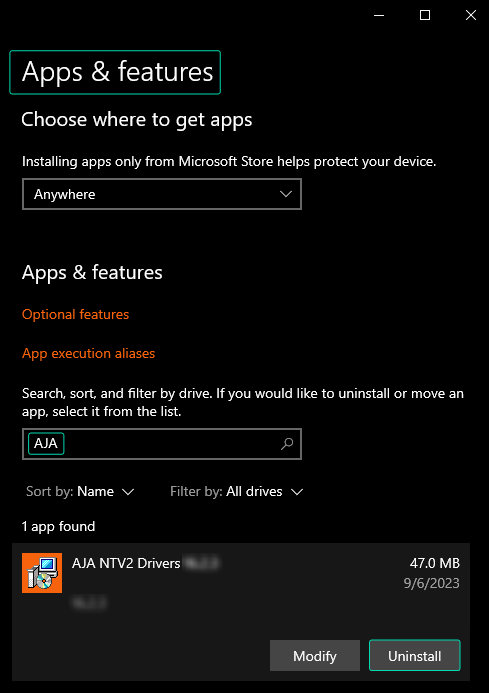
Click on the Windows Start button, find the Add or remove programs and run it.
Type AJA in the search box, uninstall anything related to AJA.
Click on the Windows Start button, find the Computer Management and run it.
Go to System Tools > Device Manager > Other Devices and check if your AJA Device is present.
In this stage you have to conduct following operations:
AJA Driver Installation
AJA Firmware Check
AJA Firmware Update (Optional)
Enter the Reality 5.3 Setup Folder.
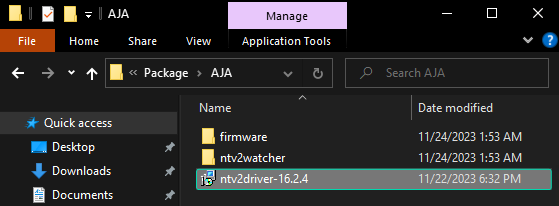
Go to Package > AJA > and click on the ntv2driver-16.2.4 installer package.
The AJA Driver Installation will be carried out silently, and no warning messages will be displayed.
Go to Setup-Reality-5.3.b447 > Package > AJA> ntv2watcher folder.
Double click on the ntv2watcher.exe
Click on the Info and check the Driver Version and Video Bitfile
If the Firmware (Video Bitfile) is not matching, proceed with AJA Firmware Update.
If your AJA Firmware (Video Bitfile) is not matching with your AJA Driver, then you have to update your firmware. To do that:
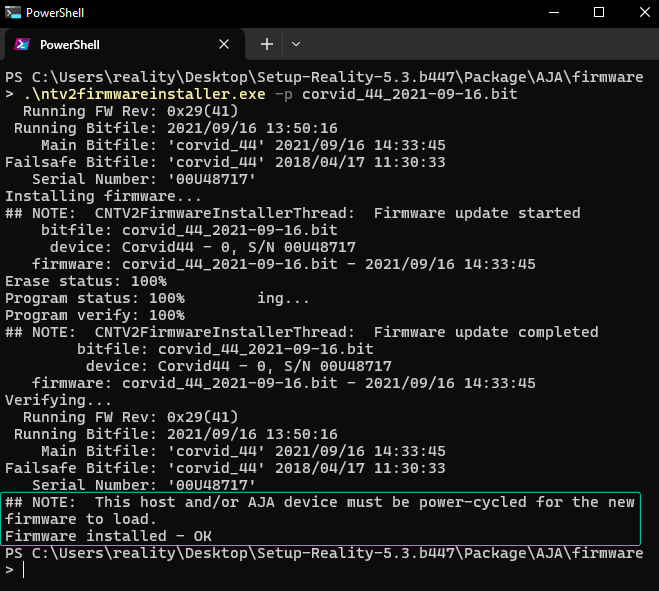
Navigate to Setup-Reality-5.3.bXXX > Package > AJA > firmware folder.
Launch your preferred command shell within the AJA folder, as demonstrated above.
Type the following command as illustrated above and hit enter on your keyboard:
Firmware update is done.
Restart the computer.