# iNEWS Configuration
{% hint style="warning" %}
Before you begin, please keep that in mind, the following configuration is intended to give you an example. In your iNEWS environment, various settings may change.
{% endhint %}
 * In the iNEWS **Directory** section, expand the **System** and double-click on the **HTML-PLUGINS**.
* Go to **File** and select **New Story**.
* Define a device name that describes Reality Hub in the **Slug Name** section.
* In the iNEWS **Directory** section, expand the **System** and double-click on the **HTML-PLUGINS**.
* Go to **File** and select **New Story**.
* Define a device name that describes Reality Hub in the **Slug Name** section.
 * Define the [Plugin URL](https://docs.zerodensity.tv/docs/v/realityhub-1.3/realityhub-1.3/integrations/inews-integration/realityhub-mos-configuration-for-inews#plugin-url) mentioned in the previous chapter.
 * Expand the **System** folder in the **iNEWS Directory** section and double-click on the **MOS-MAP**.
* Change the **Slug Name** to a **MOS-MAP**.
* Define the **Slug Content** corresponding to your system.
* Expand the **System** folder in the **iNEWS Directory** section and double-click on the **MOS-MAP**.
* Change the **Slug Name** to a **MOS-MAP**.
* Define the **Slug Content** corresponding to your system.
 * Double-click on the **MAP** in the **iNEWS Directory** section.
* Change the **Slug Name** corresponding to your system.
* Configure the **Slug Content**. In this section, you need to specify which MOS device you will use in which Rundowns.
```
// Example Mapping
172.16.0.11 MOSGW WIN-BVIR@MBFAE
172.16.0.12 ZDMOSDEV PRG-5000-PRT
```
* Configure your **Windows Host** file according to your settings as illustrated above.
* Switch to **iNEWS**, go to **Tools** > **Plugins**, and select the Reality Hub plugin.
* Double-click on the **MAP** in the **iNEWS Directory** section.
* Change the **Slug Name** corresponding to your system.
* Configure the **Slug Content**. In this section, you need to specify which MOS device you will use in which Rundowns.
```
// Example Mapping
172.16.0.11 MOSGW WIN-BVIR@MBFAE
172.16.0.12 ZDMOSDEV PRG-5000-PRT
```
* Configure your **Windows Host** file according to your settings as illustrated above.
* Switch to **iNEWS**, go to **Tools** > **Plugins**, and select the Reality Hub plugin.
 As soon as you select the Reality Hub plugin, the **Reality Hub MOS Window** appears, as shown above.
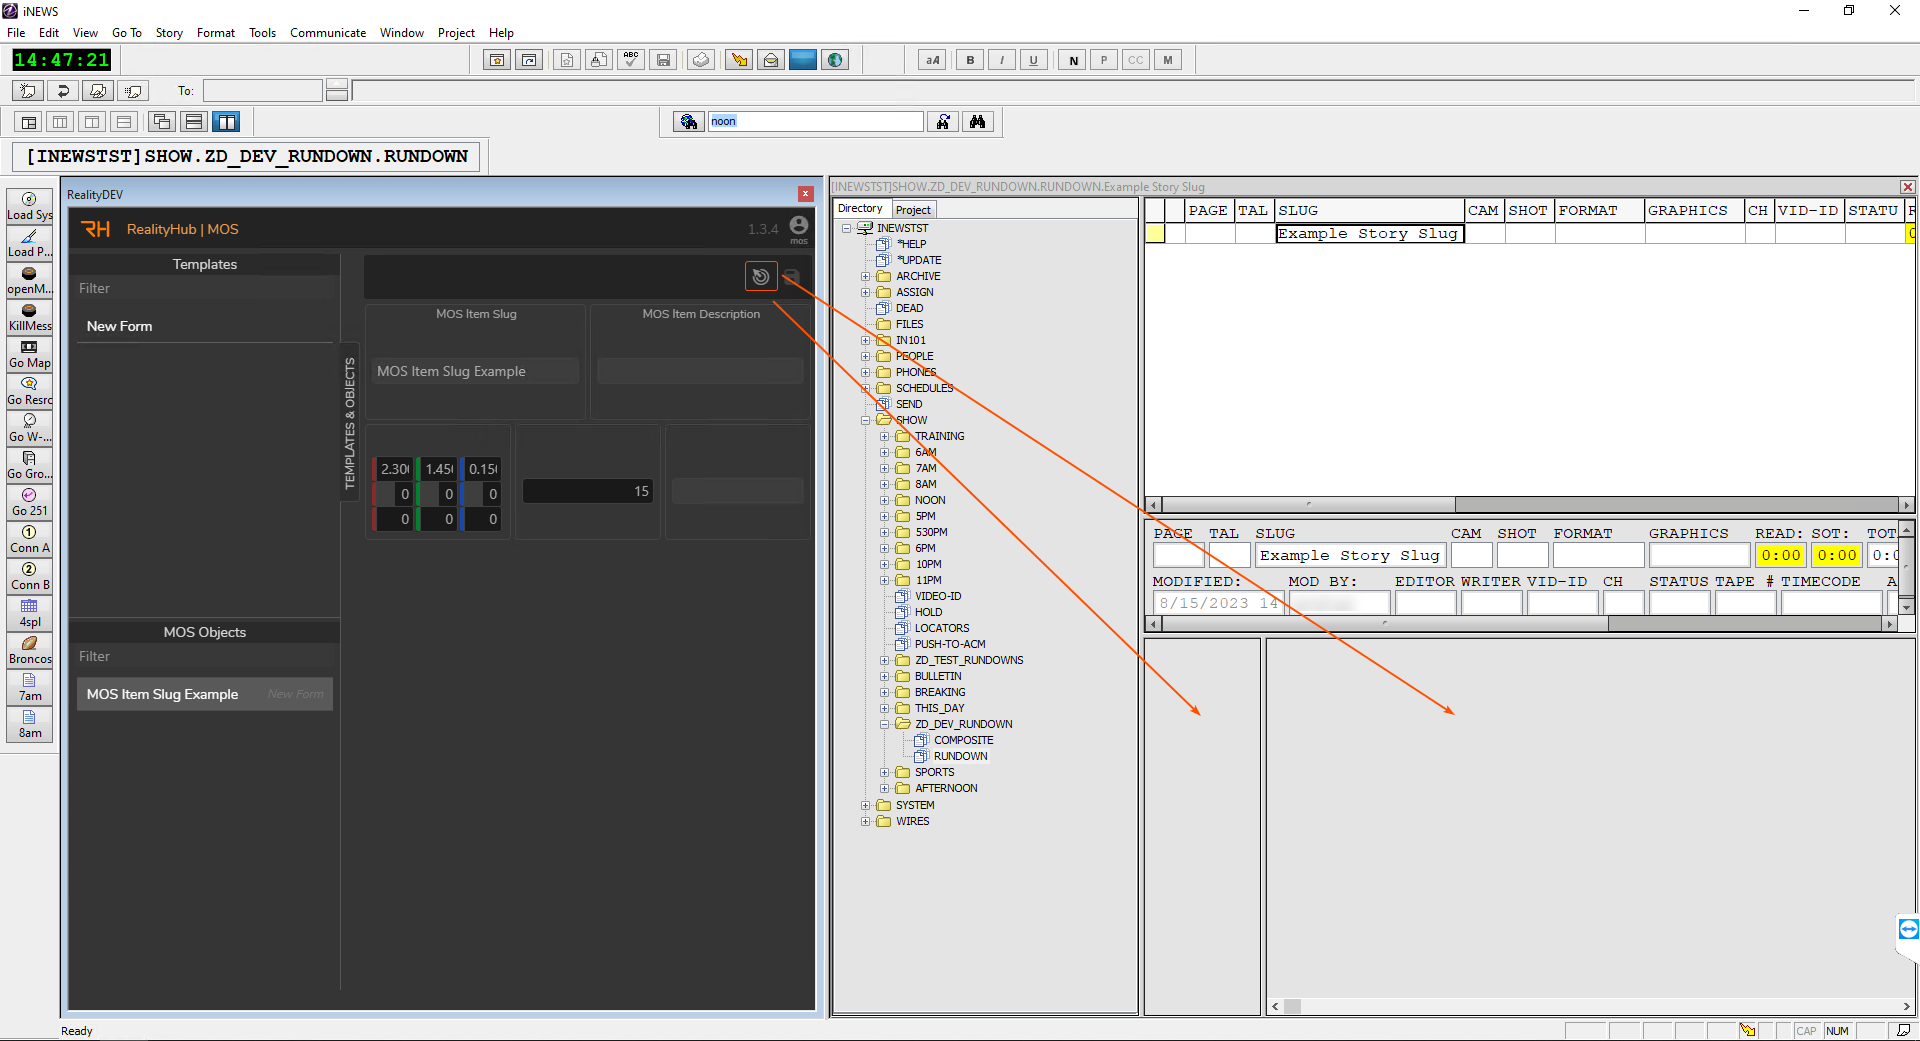
 * Go to **iNEWS Directory**, expand the **SHOW** section, expand your rundown **Folder**, and double-click on the **RUNDOWN**.
* Create a **Slug** for your **Story**.
* Select your Template Form and modify it if necessary.
* Go to **iNEWS Directory**, expand the **SHOW** section, expand your rundown **Folder**, and double-click on the **RUNDOWN**.
* Create a **Slug** for your **Story**.
* Select your Template Form and modify it if necessary.
 * As soon as you save the Template Form, the following changes occur, as shown in the image above:
* The **Drag Button** gets activated.
* **MOS Object** gets created and selected.
Let's say you change the Template Form based on the selected MOS Object. In such a scenario, the Drag button will disappear. This means that in case of an unsaved Template Form change, the Drag button will not appear until you press the Save button.
Drag and Drop MOS Item to Story
* Drag & drop your Template Form into one of the **Story Slug** sections, as shown above.
* Go to **Tools** and select the **Monitor**.
Rundown Monitor Activation
* Click on the **Device Activation** Checkbox.
* Click on the **Load** button, then go to **Tools** and select the **Monitor** once again to check if its status is **Loaded** as illustrated above.
* Switch to the Reality Hub MOS Module and check if the connections are established.
* As soon as you save the Template Form, the following changes occur, as shown in the image above:
* The **Drag Button** gets activated.
* **MOS Object** gets created and selected.
Let's say you change the Template Form based on the selected MOS Object. In such a scenario, the Drag button will disappear. This means that in case of an unsaved Template Form change, the Drag button will not appear until you press the Save button.
Drag and Drop MOS Item to Story
* Drag & drop your Template Form into one of the **Story Slug** sections, as shown above.
* Go to **Tools** and select the **Monitor**.
Rundown Monitor Activation
* Click on the **Device Activation** Checkbox.
* Click on the **Load** button, then go to **Tools** and select the **Monitor** once again to check if its status is **Loaded** as illustrated above.
* Switch to the Reality Hub MOS Module and check if the connections are established.
 * Activate the Reality Hub Newsroom Module.
* Select your Newsroom Rundown Item.
Now Reality Hub Newsroom Template Form is integrated into iNEWS Rundown and is ready to air.
---
# Agent Instructions: Querying This Documentation
If you need additional information that is not directly available in this page, you can query the documentation dynamically by asking a question.
Perform an HTTP GET request on the current page URL with the `ask` query parameter:
```
GET https://zerodensitydocumentation.gitbook.io/docs/reality-5.3-sp2/reality-5.3-sp2/integrations/inews-integration/inews-configuration.md?ask=
```
The question should be specific, self-contained, and written in natural language.
The response will contain a direct answer to the question and relevant excerpts and sources from the documentation.
Use this mechanism when the answer is not explicitly present in the current page, you need clarification or additional context, or you want to retrieve related documentation sections.
* Activate the Reality Hub Newsroom Module.
* Select your Newsroom Rundown Item.
Now Reality Hub Newsroom Template Form is integrated into iNEWS Rundown and is ready to air.
---
# Agent Instructions: Querying This Documentation
If you need additional information that is not directly available in this page, you can query the documentation dynamically by asking a question.
Perform an HTTP GET request on the current page URL with the `ask` query parameter:
```
GET https://zerodensitydocumentation.gitbook.io/docs/reality-5.3-sp2/reality-5.3-sp2/integrations/inews-integration/inews-configuration.md?ask=
```
The question should be specific, self-contained, and written in natural language.
The response will contain a direct answer to the question and relevant excerpts and sources from the documentation.
Use this mechanism when the answer is not explicitly present in the current page, you need clarification or additional context, or you want to retrieve related documentation sections.