
Channel Assignments
In Reality Hub terminology, Channels refer to designated configurations to target a specific Group(s). Channels allow you to select a particular group of Engines that will render your graphics, in other words, Channels are organized ways to distribute your graphics to different Groups.
You can have multiple Channel Assignments configurations for targeting different Groups. To set an example, in a multi-camera studio configuration, you may want to choose different graphics to be rendered by specific Engines groups, which requires you to designate specific Channel Assignments.
After configuring, you can assign channels via Form Builder, Actions, and Playout. For more details, please visit:
Channel Assignments Configuration
To configure Channel Assignments:
Go to Main Menu and click on Configuration.
Select the Channel Assignments under the Engines.
Click on the + (Plus) icon. This action automatically adds a new channel. You can change Channel Name by double-clicking on the default name. You can also choose a specific color for your channel by clicking on the Color rectangle.
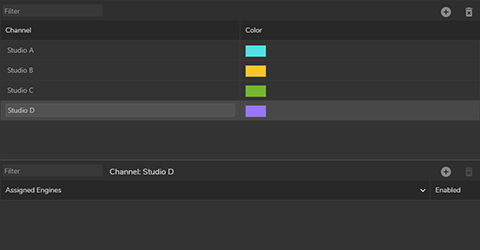
The image above illustrates that several Channels (Studio A, B, C, D) are created, and their color changed. Our channel setup is ready for the Engine assignment process.
To assign Engines to a Channel:
Select an available channel from the Channel list.
Go to the Assigned Engine section and click on the + (Plus) icon.
In the Assign Engines to Channel popup menu, select your engines and click on the Select button
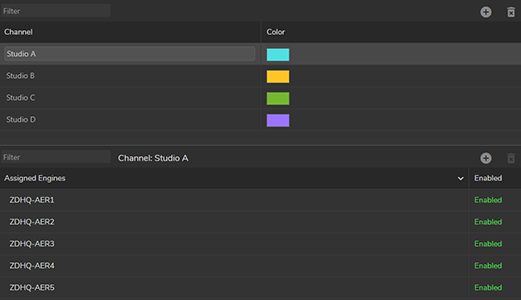
The image above illustrates that:
Four different Channels have been created (Studio A, B, C, D)
Five Engines have been assigned to the Studio A channel.
Depending on the illustration above, from now, inside the Form Builder, Actions, or Playout modules, if Studio A selected as Assignment Channel, your graphics will be transmitted only to the five Engines.