
Utilizing Initial Keyframe
This section uses the MainLevel map of the RealityExamples template, compatible with Reality Engine version 4.27. It is the default project that comes with a fresh installation. After launching the Reality Editor, you can create the same project through the Virtual Studio template. For more details, visit Reality Examples Project
To utilize the Initial Keyframe:
Launch the MainLevel map of the RealityExamples template
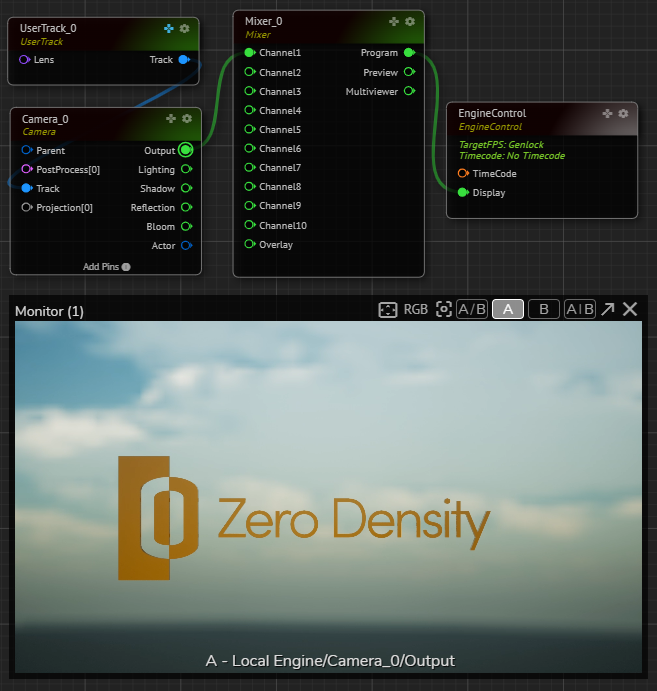
Create the node tree as shown above and activate the APM

Select the
UserTracknode, expand itsInputproperty group, and change theUserTransformproperty values as shown above
Create a new Action, add the
UserTracknode to the Action TimelineRight-click on the Property Circle of
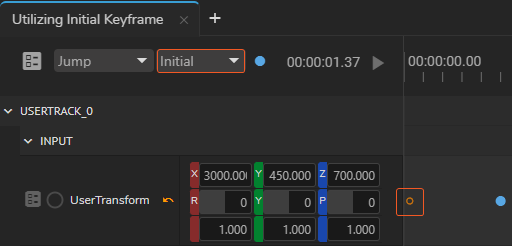
UserTransform, select the Add KeyframeScrub Playhead to second 2, add another keyframe
Select the first keyframe, and change the keyframe type to Initial, as demonstrated in the above image
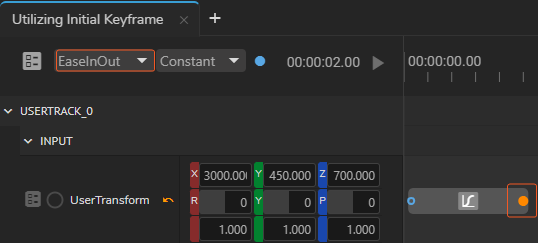
Select the second keyframe, change its interpolation to EaseInOut
Playing animation in this state will not render anything.
To see the effect:
Select the UserTransform node, activate the GamePad button
Hover your mouse over the GamePad, change the Camera view
Click on the
Playbutton
Now, pressing the Action Timeline Play button takes your camera's latest position and animates it with EaseInOut interpolation within 2 seconds of your Initial Keyframe's location.
Last updated