# Adding Reality User to Windows
It is important to add a Reality user to access the engines easily and do all the configurations, especially for remote installations and support.
### Adding a New User
Go to COMPUTER MANAGEMENT on the start menu as shown below:
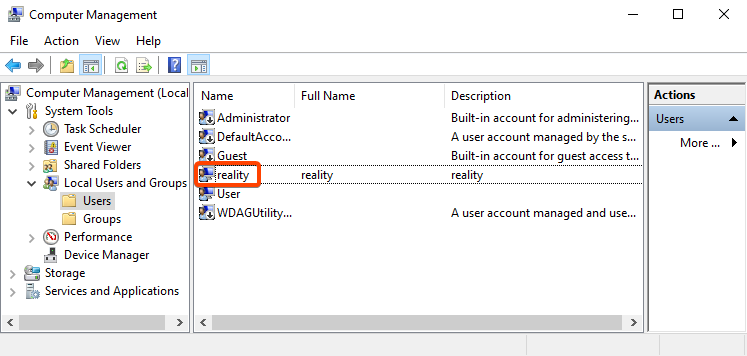
Click on **Local Users and Groups > Users** to view the existing user list.
Now right-click on the User List area and click on NEW USER ...
Create a new user with the User name: **reality**, Full name: **reality**, Description: **reality,** and Password: **reality.** Un-check option **User must change password at next logon**, check options **User cannot change password** and **Password never expires**. After making these changes, click CREATE and then CLOSE button as below:
When you go back to the User List view, you will see that the user named as **reality** is created and listed.
### Adding User to Administrators Group
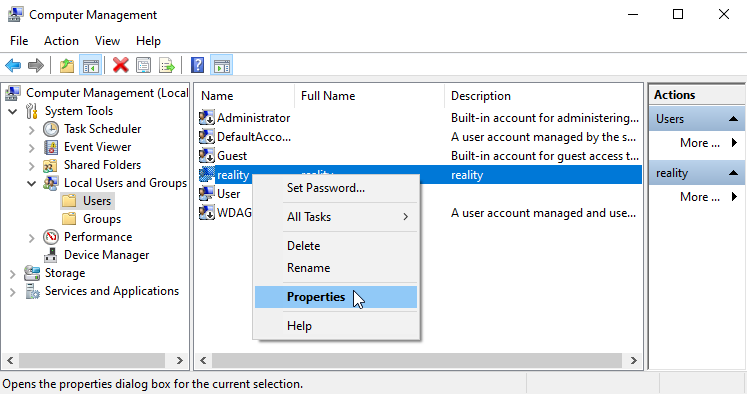
Right-click on the **reality** user and select PROPERTIES as shown below:
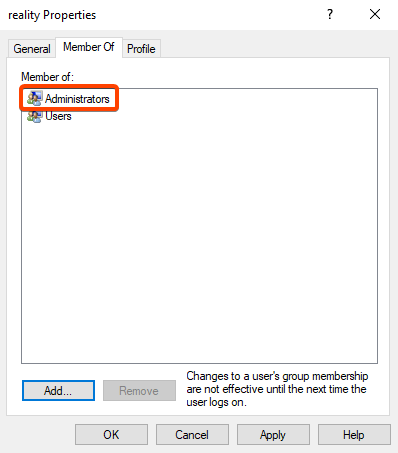
Go to **Member Of** tab on reality Properties dialog and click on ADD to add this user to another existing group.
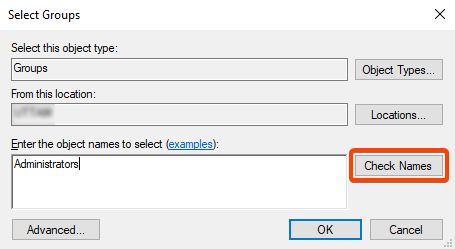
On the Select Groups window, Enter the object name as **Administrators** (subject to change depending on computers\` language settings) and click on CHECK NAMES
Once the group name is correctly typed, you will see that this user is added to the Administrators Group, click OK
You will see that this user is added to the Administrators' group.
### Setting Reality User as Default in Windows Start-up
After adding **reality** user to the Users, go to the RUN on the start menu as shown below:
On this window, type **netplwiz** and click OK
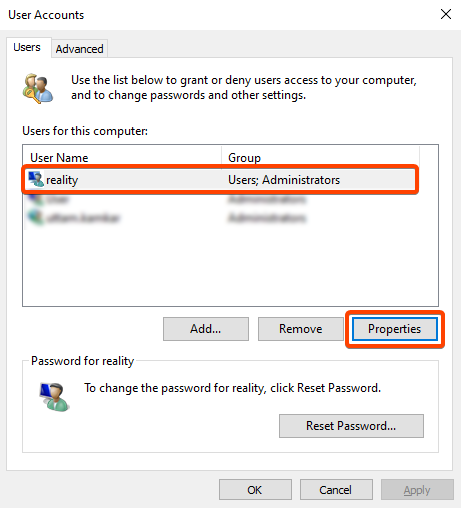
On **User Accounts** Window > **Users** tab, select "**reality**" user and click on PROPERTIES
Type the **User name**, **Full name,** and **Description** as “**reality**” and click OK
Now **reality** user is successfully added.
---
# Agent Instructions: Querying This Documentation
If you need additional information that is not directly available in this page, you can query the documentation dynamically by asking a question.
Perform an HTTP GET request on the current page URL with the `ask` query parameter:
```
GET https://zerodensitydocumentation.gitbook.io/docs/reality-4.27/reality-4.27/installation-and-configuration-guide/adding-reality-user-to-windows.md?ask=
```
The question should be specific, self-contained, and written in natural language.
The response will contain a direct answer to the question and relevant excerpts and sources from the documentation.
Use this mechanism when the answer is not explicitly present in the current page, you need clarification or additional context, or you want to retrieve related documentation sections.