# Utilizing Custom Cyclorama Mesh

### Overview

This tutorial outlines a method for painting textures directly onto a 3D mesh within Blender. This approach utilizes Blender's built-in Texture Paint mode and UV unwrapping tools to create and apply textures onto a mesh.

### Preparation

<div align="left"><figure><img src="https://content.gitbook.com/content/F00UfwVmrAMlFEsYUV8N/blobs/RVzDuI3BBseMvZyiunEn/image.png" alt="" width="375"><figcaption><p>Cyclorama Mesh</p></figcaption></figure></div>

* Prepare your cyclorama mesh according to your settings and ensure that the mesh does not have existing seams.

### UV Unwrapping

<div align="left"><figure><img src="https://content.gitbook.com/content/F00UfwVmrAMlFEsYUV8N/blobs/W5lGJYUXKKDUx1tMWFu8/2.png" alt="" width="375"><figcaption><p>Creating UV Map</p></figcaption></figure></div>

* Navigate to the UV Editing workspace.&#x20;
* Select the mesh and enter Edit Mode.&#x20;
* Select all faces.&#x20;

<div align="left"><figure><img src="https://content.gitbook.com/content/F00UfwVmrAMlFEsYUV8N/blobs/t2NlVgOeJG9yVxKs2nse/image.png" alt=""><figcaption><p>Unwrap</p></figcaption></figure></div>

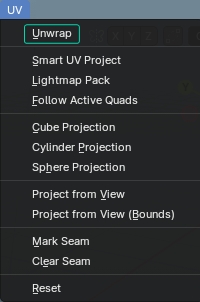
* Open the UV menu and select Unwrap to create a UV map.

### Initiating Texture Painting

<div align="left"><figure><img src="https://content.gitbook.com/content/F00UfwVmrAMlFEsYUV8N/blobs/Pr6rUiYkEbCoCw17thrr/image.png" alt="" width="375"><figcaption><p>Texture Paint Workspace</p></figcaption></figure></div>

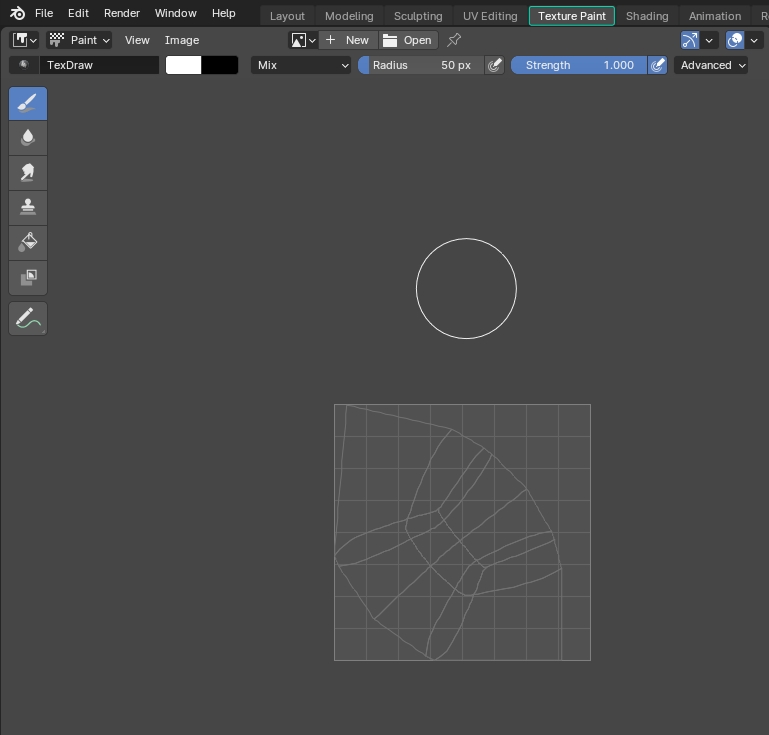
* Switch to the Texture Paint workspace.&#x20;

<div align="left"><figure><img src="https://content.gitbook.com/content/F00UfwVmrAMlFEsYUV8N/blobs/2lVhFH66LA0mLGbrJG6y/image.png" alt=""><figcaption><p>New Texture</p></figcaption></figure></div>

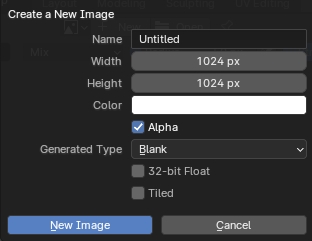
* Add a new texture, ensuring the background color is set to White.

### Assigning Material

<div align="left"><figure><img src="https://content.gitbook.com/content/F00UfwVmrAMlFEsYUV8N/blobs/EkUzVYRGbEpH4fDrJkAh/image.png" alt="" width="375"><figcaption><p>Shading Network</p></figcaption></figure></div>

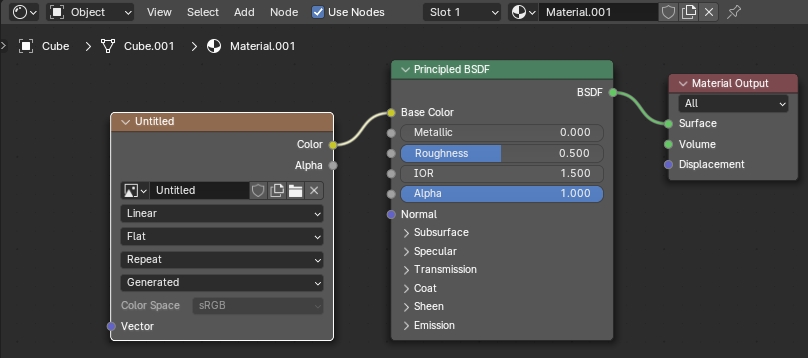
* Switch to the Shading Workspace.
* Create a new Principled BSDF material.&#x20;
* Create a new Image Texture.&#x20;
* Select the Image Texture, click on the Browse Image button, assign the painted texture to Image Texture node.&#x20;
* Connect the Color output of the Image Texture to Base Color of the Principled BSDF material.

### Texture Painting Process

<div align="left"><figure><img src="https://content.gitbook.com/content/F00UfwVmrAMlFEsYUV8N/blobs/DenlIi63upalfdVZFbVq/image.png" alt="" width="375"><figcaption><p>Texture Painting Workspace</p></figcaption></figure></div>

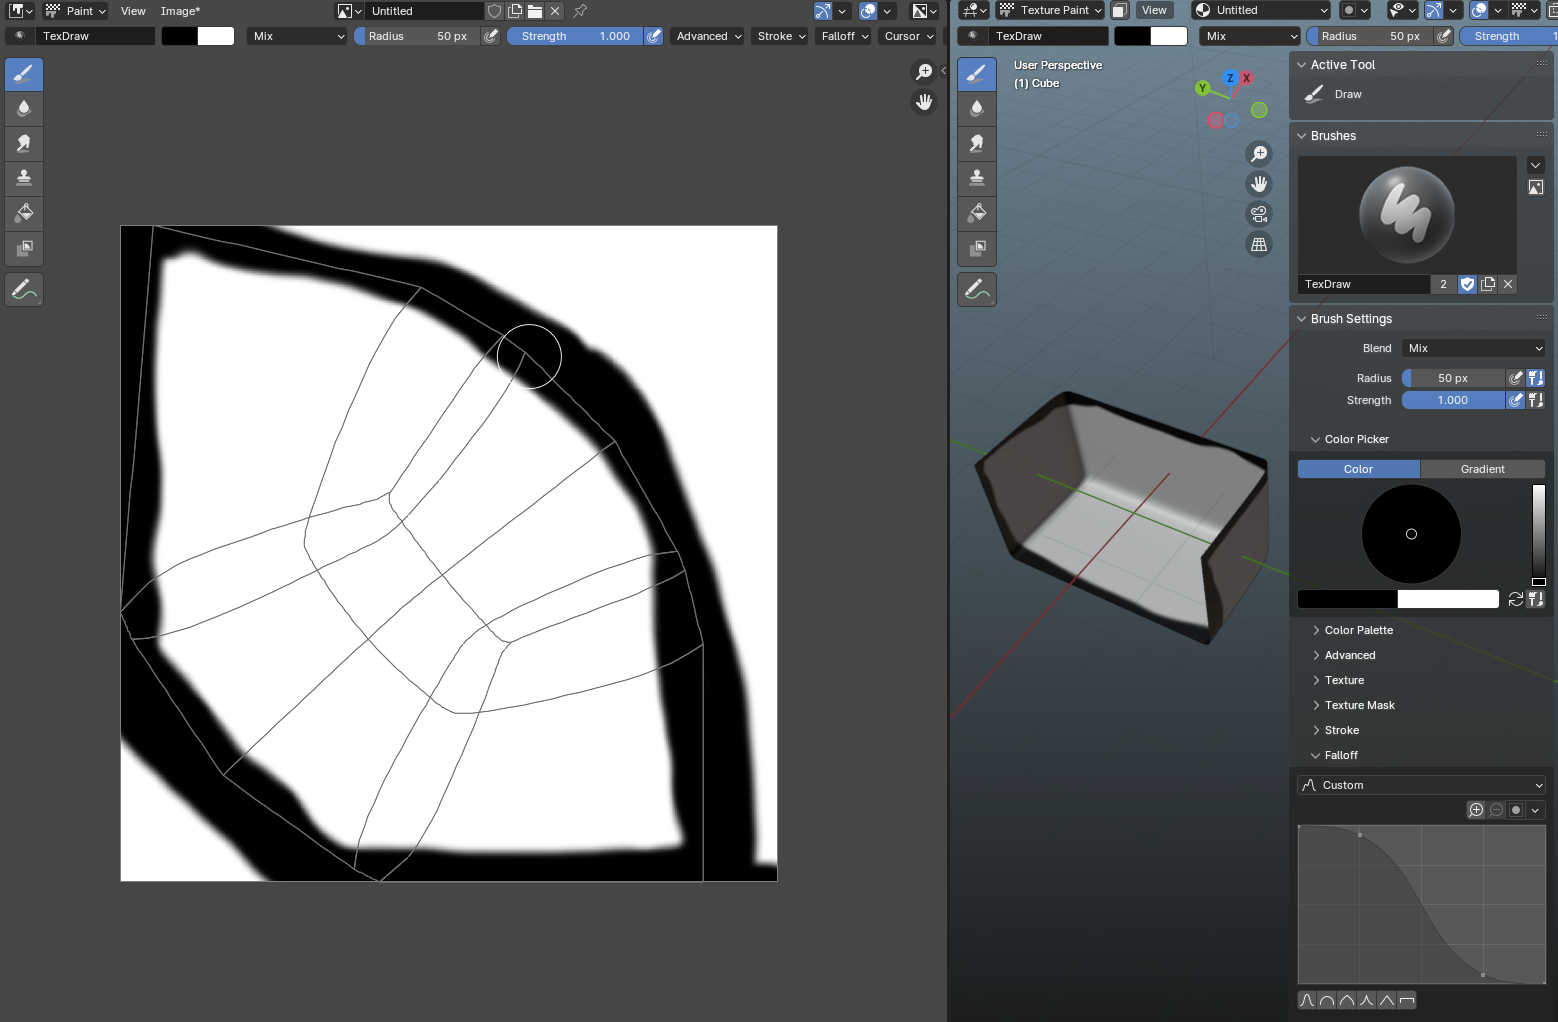
* Switch to the Texture Painting Workspace.
* Paint the outside edges of the cyclorama mesh in Black color (0, 0, 0)&#x20;
* Save the painted texture as \*.png.

### Exporting

* Switch to Object Mode and select the cyclorama object.&#x20;
* Go to File > Export > FBX.

<div align="left"><figure><img src="https://content.gitbook.com/content/F00UfwVmrAMlFEsYUV8N/blobs/RDE8lXzj7zibMBurrh4P/image.png" alt=""><figcaption><p>Exporting FBX Options</p></figcaption></figure></div>

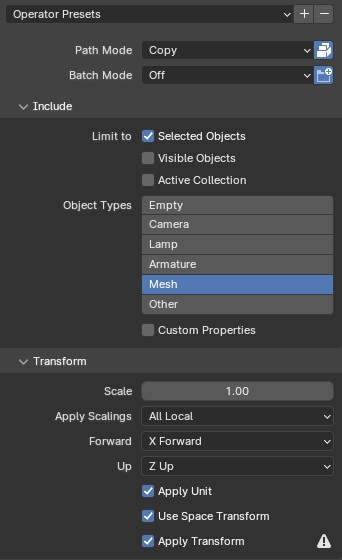
* Change the Path Mode to Copy.
* Click on the Path Mode button to include texture you painted.
* Click on the Limit to checkbox and enable Selected Object
* Select the Mesh as Object Types.
* Go to Transform property group, change the Forward to +X direction.
* Change the Up to +Z Up direction&#x20;

{% hint style="info" %}
Select Apply Transform option if you change the scale of your mesh.
{% endhint %}

* Click on the Export FBX button.

{% hint style="info" %}
The FBX file must be in a Project folder for Reality Hub to access it.
{% endhint %}

### Texture Painting with Autodesk Maya&#x20;

You can employ approximately the same method to create painted texture.&#x20;

To do that:

* Create your 3D mesh and unwrap its UVs.&#x20;
* Assign a default Maya material to the mesh such as Lambert, change its color to pure white.
* Change the Diffuse property of the Lamber to 1.000.
* Switch the Set menu to Rendering.
* Go to Texturing > 3D Paint Tool.
* Click on the Tool Settings.
* Click on the Assign/Edit File Textures.
* Change the Size X and Size Z properties to 2048.
* Change the Image Format to JPEG (jpg).
* Click on the Assign/Edit File Textures button.
* Paint the outer edges with black.&#x20;
* Export the FXB.

### Using Custom Mesh with Cyclorama Node

* Login to Reality Hub interface, launch your project.

<figure><img src="https://content.gitbook.com/content/F00UfwVmrAMlFEsYUV8N/blobs/TKF5HfdcENkLxJR0pOQA/image.png" alt=""><figcaption><p>Cyclorama Node Details</p></figcaption></figure>

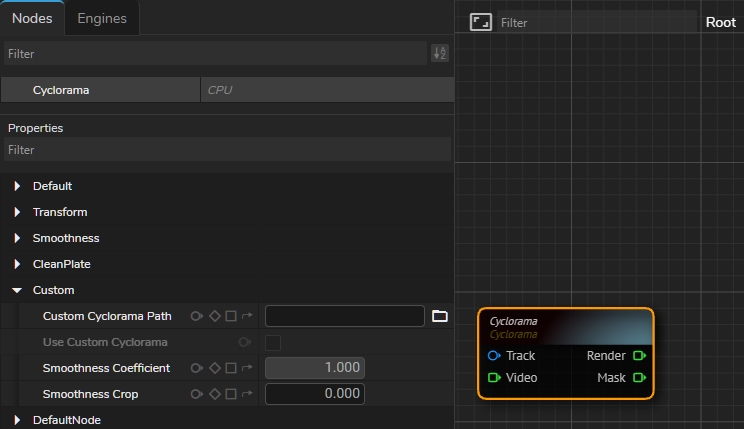
* Add a Cyclorama node.
* Expand the Custom property group.
* Navigate to the cyclorama mesh you exported, select it.

{% hint style="info" %}
Re-scan the folders in Reality Hub to ensure the exported FBX mesh is recognized.
{% endhint %}

* Click on the Use Custom Cyclorama checkbox.

### &#x20;Details

<div align="left"><figure><img src="https://content.gitbook.com/content/F00UfwVmrAMlFEsYUV8N/blobs/Ws5Sx1c6qSC4VoyDjGMs/image.png" alt=""><figcaption><p>Cyclorama Node Transform Property Group</p></figcaption></figure></div>

* Using custom cyclorama disable all transform properties of the cyclorama except for Position and Rotation since all related data comes from FXB file.&#x20;

<div align="left"><figure><img src="https://content.gitbook.com/content/F00UfwVmrAMlFEsYUV8N/blobs/a0vnkx3mdidVB2HLQIYt/image.png" alt=""><figcaption><p>Cyclorama Node Smoothness Property Group</p></figcaption></figure></div>

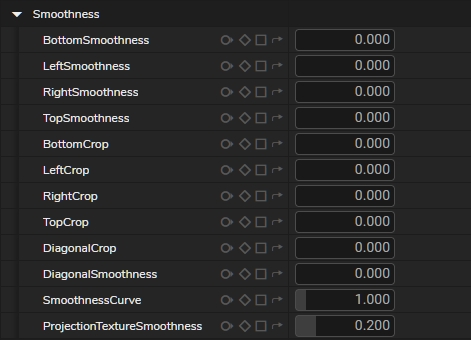
* Using custom cyclorama disable all Smoothness properties since all related data comes from FXB file.&#x20;

<div align="left"><figure><img src="https://content.gitbook.com/content/F00UfwVmrAMlFEsYUV8N/blobs/qTWpDedGghrO15a1mPHh/SOl%20taraf%20geo%20sag%20taraf%20smoothness%20gosterir.png" alt=""><figcaption><p>APM on Cyclorama Node Outputs</p></figcaption></figure></div>

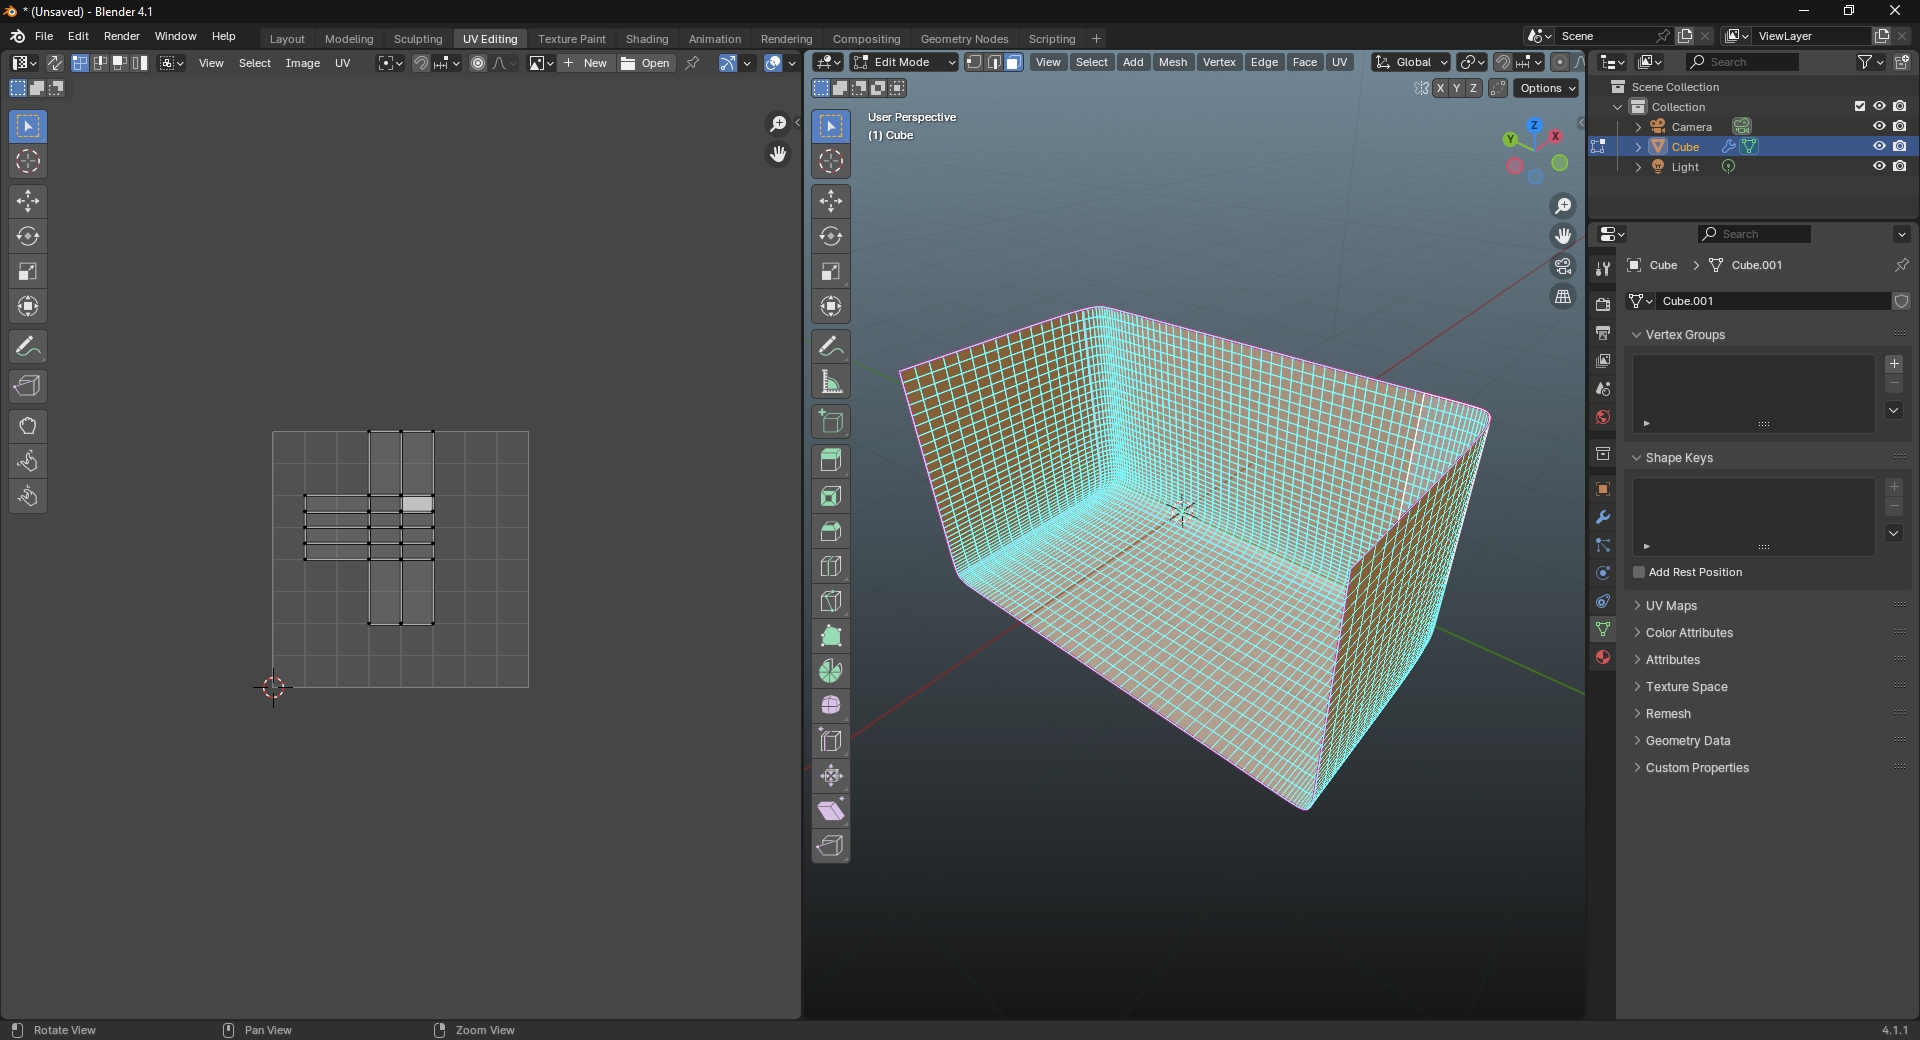
You can utilize the Advanced Preview Monitor to examine the actual FBX geometry (on the left) and smoothness (on the right), as illustrated above.
