
Operating Playout
This page was written for a previous version of RealityHub and Reality Engine and has not been updated for the current releases.
This section uses the MainLevel map of the RealityExamples template, compatible with Reality Engine version 4.27. It is the default project that comes with a fresh installation. After launching the Reality Editor, you can create the same project through the Virtual Studio template. For more details, visit Reality Examples Project

As the brief sketch above shows, the main idea in this section is to change the transform values of a virtual camera by two different animations with reversing possibility and control the animations in real-time via Rundown items inside the Playout module.
Accomplishing the abovementioned task requires you to create four (4) different virtual camera animation scenarios via the Actions module:
From View A to View B
From View B to View A (reverse)
From View B to View C
From View C to View B (reverse)
The second step in the workflow we aim for is to create a template Form through the Form Builder module.
Preparation
Launch the Reality Starter project through the Launcher module

Create the same node tree as shown above and activate the Advanced Preview Monitor (APM) on the
CameraOutputpin
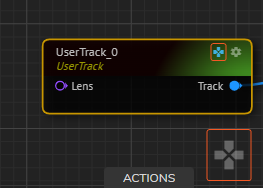
Select the
UserTracknode and activate the GamePad feature
Creating Animations


The above three images show the camera animation transform values.

Create and save the following animations as shown in the image above:
From View A to View B
From View B to View A (reverse)
From View B to View C
From View C to View B (reverse)
Preparing Template Form

Create a template form with your animations by dragging and dropping each
Playbutton to the Form Builder AreaClick on the
Field Settingsof each button and activate the Show in RundownSelect the
UserTracknode, drag and drop theUserTransformproperty directly to the Form Builder Area.
In RealityHub terminology, dragging & dropping a property/function directly to the Form Builder Area is called Property Binding.
Click on the
RT(Realtime Updates On) buttonSave the template Form
Activate the Playout module
Playout Operations
Assigning Shortcut

Select the template Form located inside the Playout Template Form Area, drag & drop it to the Rundown Area

Click on the Edit Keyboard Shortcuts button, select a Rundown Item
Click on a three-button combination on your keyboard that contains two of the CTRL, ALT, and SHIFT buttons and other characters (Example CTRL + ALT + X)
Various special characters and keyboard shortcuts may not work in your case. To set an example, if you try to assign CTRL + SHIFT + N button combination will fail because the keyboard combination is already assigned to the New Incognito Window shortcut of the browser.
Select the second button, assign another unique keyboard shortcut combination
Repeat your action for the third and the fourth buttons
Click on the Edit Keyboard Shortcut button again
Creating a New Rundown by Changing Bounded Property

In the Preparing Template Form section of this article, UserTransform property of the UserTrack node was bounded as shown in the image above. The bounded UserTransform values are the same as in View B.
Let's assume that you want to create different versions of your animations and trigger/play them via Rundown. In such a scenario you can create new Rundown Items. You can apply the same logic to template forms fed with data.
To utilize the abovementioned approach:
Click on the
From A to Bbutton to have the same camera transform values as View BChange the Y value from 800 to 100

As soon as you change a property value inside the Playout Template Form Area, various changes occur as shown above:
Playout Template Form buttons get activated.
Undo button inside the property group gets activated.
For the functionality of the Playout Template Form buttons, please visit the Playout Interface section.
Now:
![]()
Click on the Save As button.

Give a name to the new Rundown Item, and click
OK
